Frequently Asked Question
Client Software: How to connect camera to CMS in LAN?
Last Updated 11 years ago
To view your cameras on CMS, please follow the steps below to setup your settings.
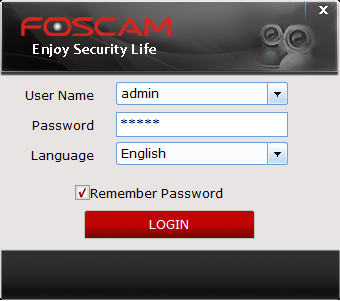
Step 1:
Log-in CMS, input the CMS username and password.
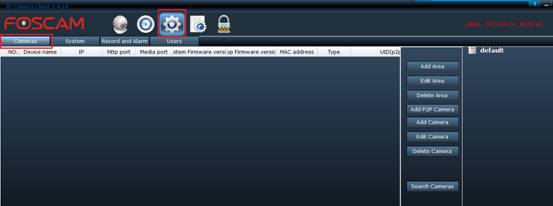
Step 2:
Login CMS, go to Settings --> Cameras section, click Search Cameras to find all your cameras in LAN.
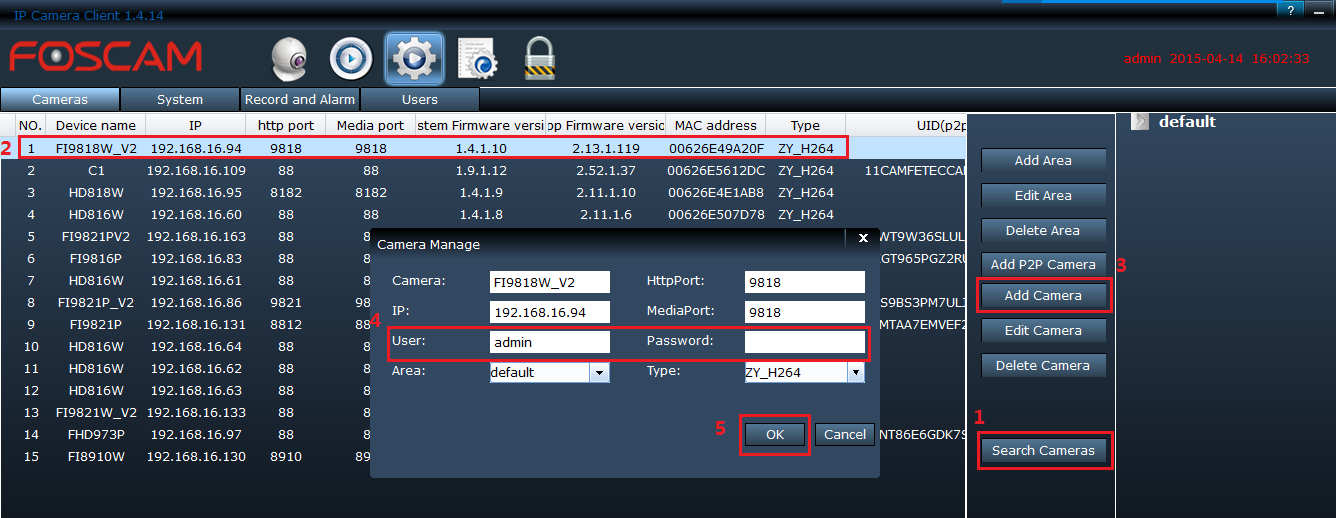
Step 3:
Select the camera you want to added, then click Add camera. It will pop up the Camera Manage window, please input the basic infos of this camera, then click OK. Note:
1. Media port is same as your Http port;
2. Input your camera’s login user and password, both are case sensitive;
3. You can leave “Area” as default or choose the one you have created;
4. For the Type field, MJ cameras choose MJPEG, HD cameras choose ZY_H264.
Step 4:
Go back to Live Video page. On the left Area window, please drop down the “default” area, you’ll find the camera just added. Click on the camera icon to connect, then you can view your camera video in LAN.
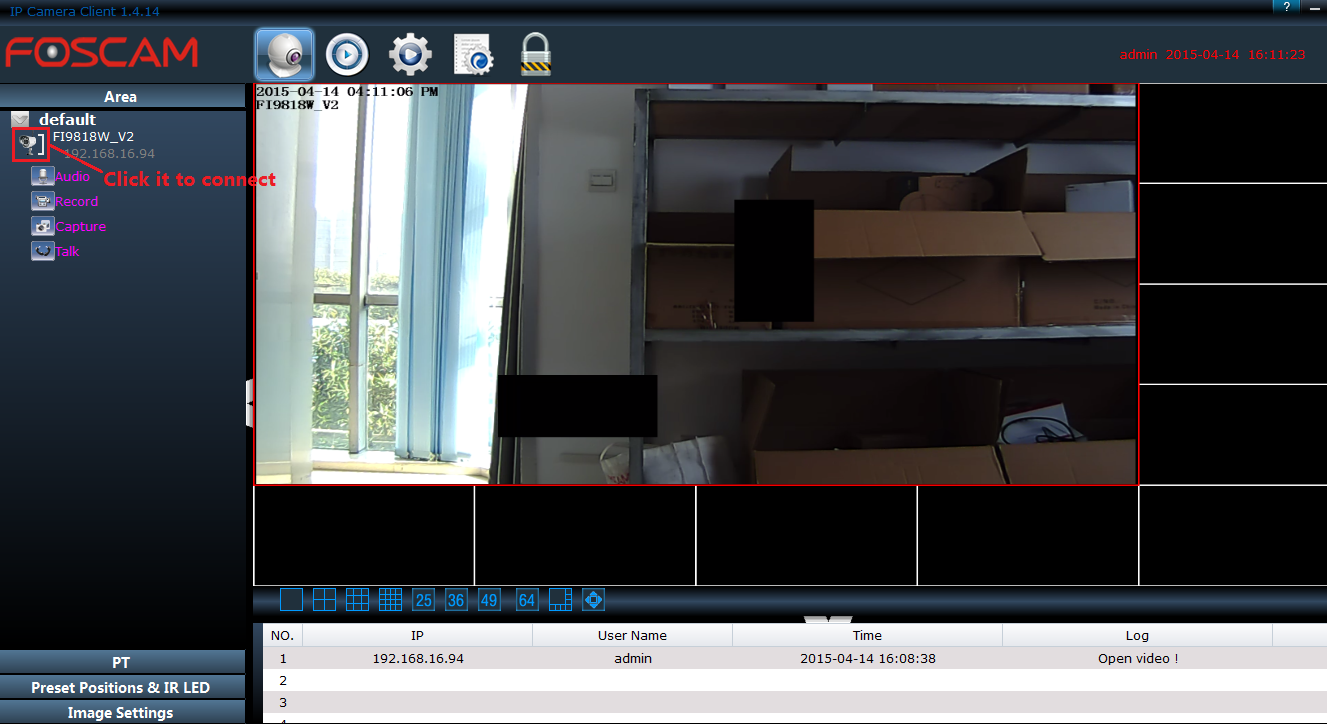
Attention:
If it doesn’t show the four buttons (Audio, Record, Capture and Talk) like the above screenshot, that means you didn’t add the camera succeed. Please make sure the username and password of your camera are correct, you can check them by logging the camera on web page, like IE, Chrome or Firefox.
Step 1:
Log-in CMS, input the CMS username and password.
Step 2:
Login CMS, go to Settings --> Cameras section, click Search Cameras to find all your cameras in LAN.
Step 3:
Select the camera you want to added, then click Add camera. It will pop up the Camera Manage window, please input the basic infos of this camera, then click OK. Note:
1. Media port is same as your Http port;
2. Input your camera’s login user and password, both are case sensitive;
3. You can leave “Area” as default or choose the one you have created;
4. For the Type field, MJ cameras choose MJPEG, HD cameras choose ZY_H264.
Step 4:
Go back to Live Video page. On the left Area window, please drop down the “default” area, you’ll find the camera just added. Click on the camera icon to connect, then you can view your camera video in LAN.
Attention:
If it doesn’t show the four buttons (Audio, Record, Capture and Talk) like the above screenshot, that means you didn’t add the camera succeed. Please make sure the username and password of your camera are correct, you can check them by logging the camera on web page, like IE, Chrome or Firefox.
ZGTLv150928