Frequently Asked Question
Multimedia: How to manage videos with Video Station?
Last Updated 9 years ago
Overview
Video Station (5.0) is a management tool for organizing video files on your QNAP NAS. You can classify videos in your personal collections and then share them with friends and family online.Starting Video Station
Ensure that Video Station has been installed and enabled in the App Center. 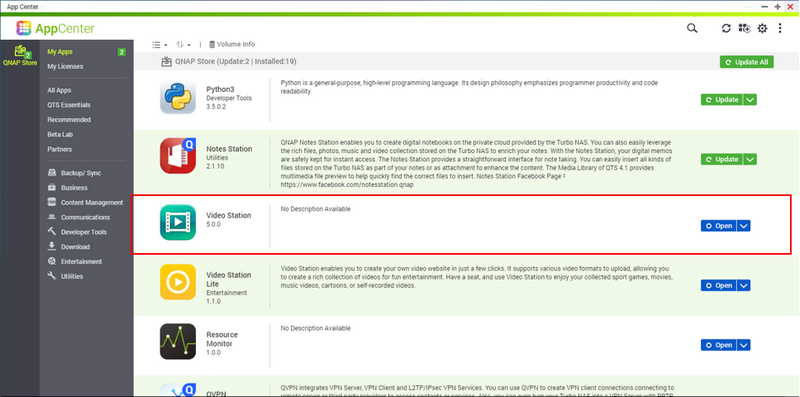
Importing Videos to the QNAP NAS
Shared folder permissions determine your access to files. Users with read/write and read-only access can see all videos in a folder. However, only users with write access are allowed to upload video files to a shared folder. - Click “
” on the menu bar.
- Select the destination folder where you want to upload the files.
- Select the rule for duplicate files.
- Click “Upload from PC” or drag and drop the files into the Upload window.
- Click “OK”.
Tip:
To import a large number of files or folders, perform the steps described in the table below. You can also upload files using Video Station, File Station, FTP, or via Qfile from your mobile device.
Note:- Video thumbnails will be automatically generated to enhance your viewing experience.
- The time required to generate thumbnails depends on NAS models and the number of multimedia files.
- Go to "Control Panel" > "Privilege Settings" > "Shared Folders".
- Click “Create” > “Shared Folder”.
- Provide the following information.
- Folder name
- Comment (optional)
- Disk volume
- Path
- (Optional) Beside Configure access privilege for users, click “Edit” and then select the permission for each user.
- RO – Read only
- RW – Read/write
- Deny – No access
- (Optional) Beside Folder Encryption, click “Edit”.
- Select “Encryption”.
- Type and verify the password.
- (Optional) Select “Save encryption key”.
- (Optional) Beside Advanced settings, click “Edit” and then select all that apply.
Using Video Classification
Use video classification to manage your videos. Video Station allows you to perform the following tasks.Assigning a Default Classification
- Go to “Settings” > “Classification settings”.
- Click a video classification and then click “+Add”.
- Select the content folder.
- Select the default classification.
- Select “Apply the classification to all videos in the folder”.
- Click “OK”.
Perform any of the following steps.
- Drag and drop the files into the new classification on the left panel.
- Click
or right-click a thumbnail and then select “Information” to select a new classification.
- Go to “Settings” > “Classification settings”.
- Click “Add classification”.
- Type a classification name.
- Click “Create”.
- Video Station supports a maximum of 16 new classifications.
Managing Movies and TV Series
Video Station automatically downloads related information (poster, director, actors, etc.) for videos that are classified as movies or TV shows. Video Station allows you to perform the following tasks.Installing Media Add-ons
QNAP provides media add-ons for users to incorporate online databases into Video Station. For videos classified as Movies or TV Shows, media add-ons can enrich them with important information such as poster, year, director, and cast. To install media add-ons, go to “Control Panel” > “Applications” > “Multimedia Management” > “Media Add-on”.
After installing media add-ons, go to “Settings” in Video Station and select the online database you prefer (the default database is IMDB).
Editing Video Information
- Click
- Click
or “Search the Internet for introduction”.
- Type a keyword and then click “Search”.
- Select the relevant information from the search results.
- Click “Apply”.
- Click
- Click “Change poster”.
- Click “Upload” or “Import poster from URL”.
Video Station allows you to display only videos from a specific genre.
- Go to “Movies” or “TV shows”.
- Click “Filter” and then select the genre.
Video Station automatically classifies TV shows according to their seasons, episodes, and titles if you arrange and name files in a specific order. To correctly categorize videos, follow these rules:
- Folder Rule: In your default folder for “TV Shows”, create a folder with the same name as the TV show and upload the related videos to this folder.
- Filename Rule: Name your videos in the format [TV show name-Season-Episode]. For example, the first episode of the first season of a show should be named “Show Name.S01E01”.
Video Station records playback information. To resume video playback, click
Creating Video Collections
A video collection is a virtual folder that you can use to collect videos.Adding Videos to a Collection
Perform any of the following steps.
- Drag and drop the files into the new classification on the left panel.
- Click
Tip: You can put videos in a default collection like “My Favorite”.
Alternatively, you can clickto create a new collection.
A smart collection automatically collects videos that meet certain criteria. To create a smart collection, click
After you decide on the criteria, the smart collection automatically collects all the videos that meet your criteria.
Using the Action Bar
- Advanced Search
Clickand specify the search criteria.
Tip: Using specific search parameters can help improve your search results.
- Settings
Click “Settings” to access Settings, Quick Start, Help, and About.
You can configure the following from the Settings screen.- Classification settings: You can add new classifications or new media folders to existing classifications and decide whether to show or hide the folder contents. You can also add more data sources to movies and TV shows.
- Search subtitles: Decide whether to search for subtitles using Internet databases in the languages you prefer. You can also log into OpenSubtitles when searching for subtitles.
- Privilege: Decide whether to allow NAS users and domain users to use on-the-fly transcoding and multi-zone streaming.
- Miscellaneous: Select the default folder for video uploads.
- Multi-zone control display
Video Station supports multi-zone control display, allowing you to stream videos from your QNAP NAS to media devices that support DLNA or AirPlay (Apple TV, Samsung Smart TV, Xbox One, etc.) and that are in the same subnet. You can right-click thumbnails, select “streaming to”, and choose a device. You can also clickand then drag and drop videos to a media device.
You can stream multiple videos to the same media device on your network. You can also choose to either add videos to a playlist or replace the current video playing on the device.
You also can stream videos to different media devices.
Note:- The media devices must be on the same network as your NAS.
- The “Media Streaming add-on” must be installed in the App Center to enable Chromecast.
- Disabling the DLNA media server or Bonjour will cause Chromecast and Airplay to malfunction.
- Viewing Mode
There are two viewing modes in Video Station: “Show items as icons” and “Show items in a list”.
- Index
You can index your videos by their title, date imported, duration, resolution, color label, or rating.
- Filter
You can filter videos by genre, year, director, or cast.
Note:- This feature only supports videos classified as movies or TV shows.
- Video Transcoding
To convert videos to a format compatible with your media devices, perform any of the following steps.- Right-click a video and then select “Add to Transcode”.
- Select a video and then click
on the menu bar.
Note:- The video conversion duration depends on the NAS model and available computing resources.
- Converted videos will be saved in a folder named“@Transcode” in the original video folder.
- To transcode videos, you must enable transcoding in Control Panel.
- Subtitles can be embedded with time shift in “Adjust Subtitles”.
- Uploading Videos
- Click
- Select the destination folder where you want to upload the files.
- Select the rule for duplicate files.
- Click “Upload from PC” or drag and drop the files into the Upload window.
- Click “OK”.
- Click
- Downloading Videos
To download videos, clickand select “Download” or “Download with subtitles”.
- Sharing Videos
Clickor right-click thumbnails and then select “Share”.
Video Stations allows you to:- Share videos via email, social networking websites, or sharing links.
- Create a link using SSL to ensure the safety of your shared files.
- Set an expiration date, after which other users will no longer be able to access your shared files.
- Protect your shared files with a password. Other users will need to enter the password to unlock the shared files.
- Sharing via email
To share videos by email, click “Add email account” > “Options”.
Alternatively, clickto set up your email account.
- Sharing via social networks
You can share videos on social networking sites such as Facebook, Twitter, and Weibo.
You can also upload videos to YouTube and YOUKU. To check the upload progress, click “Background Task”.
- Sharing via links
You can create sharing links in either URL or HTML format, which you can embed on your website or blog.
- Share videos via email, social networking websites, or sharing links.
- Select Multiple Items
To enable multi-selection, clickon the menu bar. Empty circles will then appear on the top-left corner of video thumbnails. Click circles to select the videos you want for further operations. You can also select or deselect all the videos on the current page.
Shared Center
Click “Shared Center” to view the details of your sharing history. You can also clickVideo Player
- Streaming to
Clickto stream videos to media devices on your network.
- Add to Transcode
You can choose the resolution, sound track, and other attributes. You can also embed the current subtitles into the converted video.
- Bookmark
Creating bookmarks allow you to quickly locate specific parts of a video the next time you play it.- Click
to highlight and comment on your favorite moments.
- Enter a description or comment for the moment and then click“Add”.
You can see your bookmarks on the progress bar when you play back the video.
- Click
- Displaying Subtitles
There are three ways to add subtitles:- Save the subtitle file in the same directory as the video file and give them the same file name.
- Click “Import subtitles” to upload subtitle files from your local device.
- Click “Search for subtitles” to search for subtitles on online subtitle databases.
- “Import subtitles” and “Search for subtitles” are only supported in Video Station 4.2.0 (or later).
- Supported subtitle file formats: .srt, .ass and .ssa.
Tip:
You can switch between different languages if subtitle files are available.
Adding Subtitles from the Video Player
Perform any of the following steps.- Click "Import subtitles" and upload subtitle files from the NAS or your local device.
- Click "Search for subtitles".
Tip: You can adjust the font, size, and color subtitles, or move them forward or backward during video playback.
Note:- Video Station displays subtitles in .MKV and .ISO file formats.
- You must install CodexPach add-on and use on-the-fly transcoding.
Converting Subtitles
To convert subtitle files that are not compatible with Video Staion, QNAP recommends using Aegisub.For more information, go to http://wikipedia.org/wiki/Aegisub
Download and Install Aegisub:
- Go to http://www.aegisub.org/ and select the installation package for your operating system
- Once Aegisub is installed, go to “File” > "Open Subtitles" and then select the subtitle file
- Click "Export Subtitles", select "UTF-8" format, and click "Export".
Advanced Management (Media Library)
Media Library scans multimedia files in the designated media folders and imports them to multimedia applications. You can choose to either manually start a scan or set up a scheduled scan. You can also configure Media Library to only scan certain folders or media types.To perform a manual or scheduled scan, go to "Control Panel" > "Applications" > "Multimedia Management" > “Media Library” and then select your preferred scan method under Scan Settings.
Note: Photo Station, Music Station, Video Station and DLNA Media Server share the Media Library folders. Any changes made to the Media Library folders affect all four applications.
ZGTLv170217