Frequently Asked Question
HD: How to setup remote access settings?
Last Updated 10 years ago
Step 1:
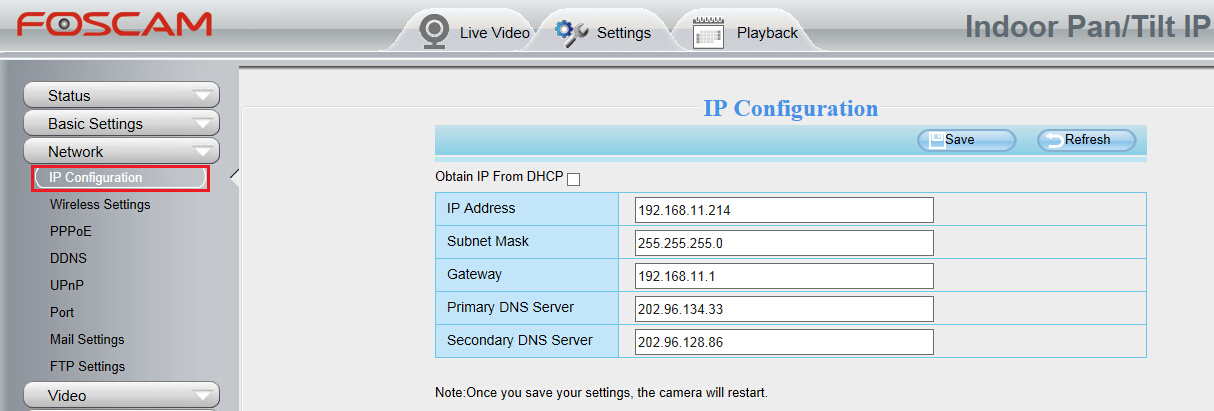
Set a static IP address for camera.
Please go to Settings tab --> Network --> IP Configuration.
1. The first three numbers of camera’s IP address are the same as your router which the camera is connected.
The last number is between 1~255 and it’s unique on this network.
2. Subnet mask is 255.255.255.0.
3. Gateway and DNS Server should the same as your router. Login your router first, you will find them on the Status or Overview menu.
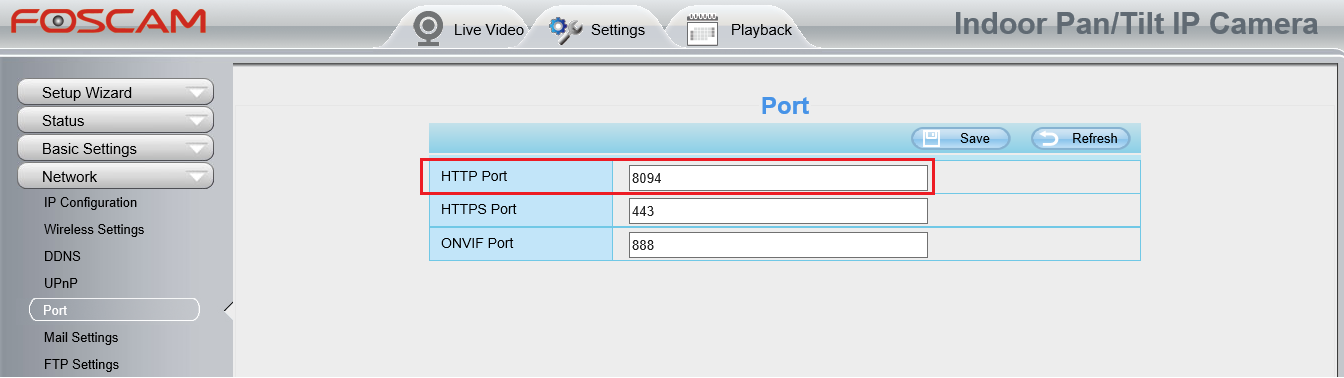
4. Set a port number for camera.
5. Click Save to save the settings.
6. Set a http port for your camera.
Step 2:
A. Enable UPnP on both your camera and router.
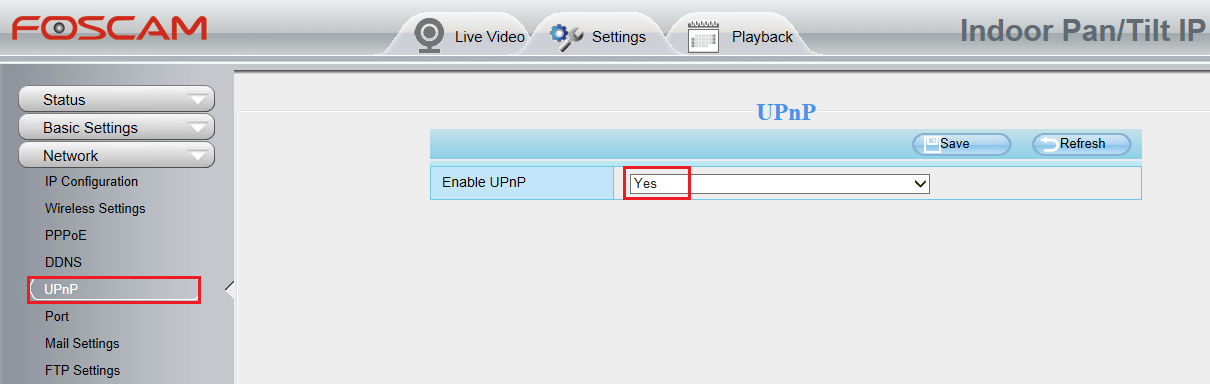
B.Some router don’t support UPnP or the UPnP is disabled, so enable UPnP maybe not successful. In this case, please set
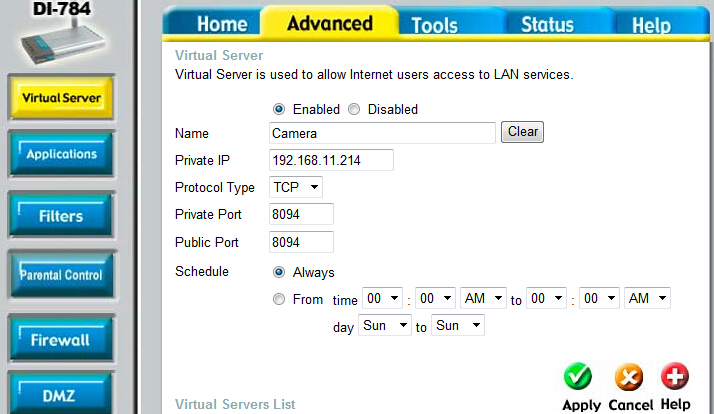
port forwarding on router for your camera.
Port forwarding is mostly on Port Forwarding or Virtual Server section of router’s administration page, it’s up to different routers.
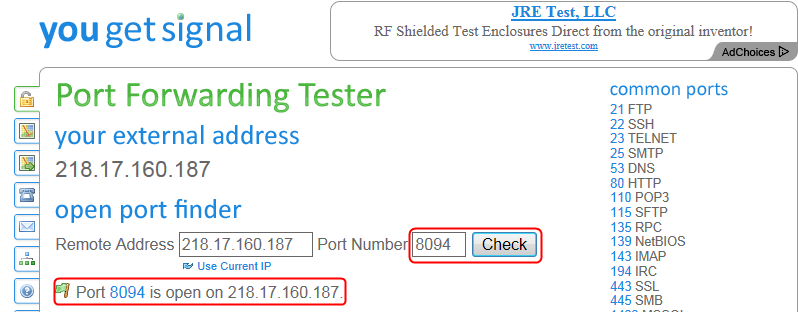
Step 3:
The port is forwarded or not can be test on http://www.yougetsignal.com/tools/open-ports/
Step 4:
Check DDNS Status on Device Status page, it should be succeed. Reboot your camera if necessary.
Step 5:
Try to remotely access your camera via Internet with Domian name+port number. eg. Http://ab1234.myfoscam.org:8094 to login.
Note: Some routers do not allow loop back. You can not access your camera within your LAN when using the Domain name/WAN IP+port number. Please try accessing your camera out of your home network.
END
Set a static IP address for camera.
Please go to Settings tab --> Network --> IP Configuration.
1. The first three numbers of camera’s IP address are the same as your router which the camera is connected.
The last number is between 1~255 and it’s unique on this network.
2. Subnet mask is 255.255.255.0.
3. Gateway and DNS Server should the same as your router. Login your router first, you will find them on the Status or Overview menu.
4. Set a port number for camera.
5. Click Save to save the settings.
6. Set a http port for your camera.
Step 2:
A. Enable UPnP on both your camera and router.
B.Some router don’t support UPnP or the UPnP is disabled, so enable UPnP maybe not successful. In this case, please set
port forwarding on router for your camera.
Port forwarding is mostly on Port Forwarding or Virtual Server section of router’s administration page, it’s up to different routers.
Step 3:
The port is forwarded or not can be test on http://www.yougetsignal.com/tools/open-ports/
Step 4:
Check DDNS Status on Device Status page, it should be succeed. Reboot your camera if necessary.
Step 5:
Try to remotely access your camera via Internet with Domian name+port number. eg. Http://ab1234.myfoscam.org:8094 to login.
Note: Some routers do not allow loop back. You can not access your camera within your LAN when using the Domain name/WAN IP+port number. Please try accessing your camera out of your home network.
END
ZGTLv151101